Spark Holiday Magic: Easy DIY Christmas Ornaments & Crafts to Make with Kids
Turn your living room into a festive workshop with simple, kid‑friendly ornament ideas that sparkle on the tree. From pinecone glitter gems to recyclable paper snowflakes, these projects create lasting memories and a handmade holiday vibe.
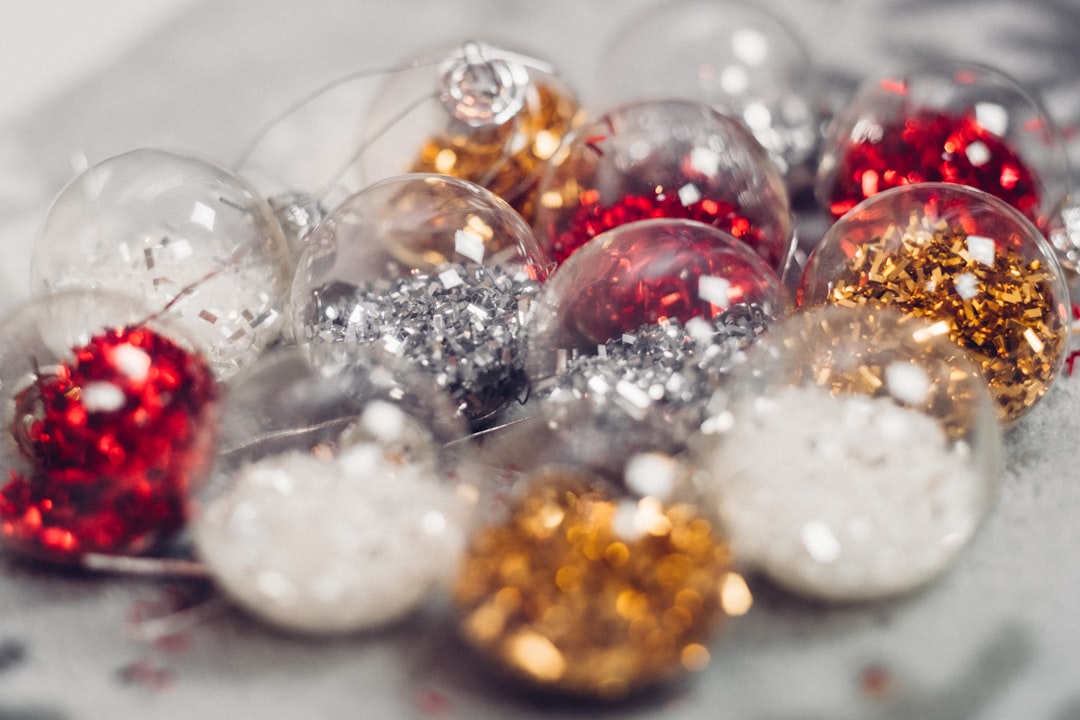
Gather Your Holiday Craft Supplies – The Ultimate Checklist
Before the glitter flies and the glue sticks, make sure you have everything you need within arm’s reach. Having a well‑stocked craft station keeps the excitement flowing and reduces the dreaded "Where’s the scissors?" moment. Here’s a quick inventory you can print and tape to the fridge:
- Basic tools: safety scissors, child‑safe craft knives, wooden skewers or cocktail sticks, and a sturdy pair of tweezers for tiny beads.
- Adhesives: non‑drying craft glue, hot glue gun (adult‑only), double‑sided tape, and a roll of clear tape.
- Paper & card stock: white, colored, patterned, and recyclable newspaper.
- Natural materials: pinecones, twigs, dried orange slices, cinnamon sticks, and small pine branches.
- Decorative extras: glitter (fine and chunky), sequins, pom‑poms, googly eyes, ribbons, fabric scraps, felt shapes, and reusable stickers.
- Painting supplies: washable acrylic paints, brushes of various sizes, water cups, and a palette or paper plate.
- Safety items: aprons or old shirts, newspaper or a plastic tablecloth, and a well‑ventilated space for any glue that has a strong odor.
Pro tip: Use a large, shallow tray or a zip‑top bag to keep small beads and sequins from scattering across the floor. Kids love the tactile feel of sorting them by color, and it doubles as a calming fine‑motor activity.
Pinecone Snowflake Ornaments – Nature’s Little Stars
This project is perfect for younger kids who love exploring textures. Pinecones are abundant in many regions during the holidays, and they make charming, rustic ornaments with minimal prep.
- Collect & Clean: Take a short walk together to gather 5‑10 pinecones. Gently brush off any loose needles and wipe them with a damp cloth. Let them dry completely.
- Trim the Bottom: Using child‑safe scissors, cut the very tip off the bottom so the pinecone can sit flat on a surface.
- Paint the Base: Provide a few colors of washable paint (white, silver, light blue). Let kids dip a brush into the paint and coat the pinecone lightly. For a snow‑dusted look, sprinkle a little white glitter while the paint is still wet.
- Add Sparkle: Once the paint dries, drizzle or dab on extra glitter. Use a small brush or a disposable toothbrush to flick glitter for a subtle sparkle.
- Attach a Hanger: Cut a 6‑inch piece of ribbon or twine. Thread it through the top of the pinecone and tie a secure knot. For extra stability, add a dab of clear tape on the knot.
Hang these pinecone snowflakes on your tree, mantel, or even as a festive garland across a doorway. The natural scent of pine adds an extra holiday aroma to your home.
Recycled Paper Snowflakes – Eco‑Friendly Twinklers
Turn ordinary printer paper into dazzling snowflake ornaments. This activity encourages creativity while teaching kids about recycling and the magic of symmetry.
- Fold a Square: Show children how to fold a square piece of paper into a triangle, then into a smaller triangle. Use a ruler to help them make crisp folds.
- Cut Out Shapes: With child‑safe scissors, let them snip along the edges of the folded paper. They can create triangles, circles, or even tiny hearts. Remind them to leave a small border around the center to keep the snowflake intact.
- Unfold & Decorate: Gently unfold the paper to reveal a unique snowflake. Offer metallic markers, water‑based glitter pens, or stickers for decoration.
- Seal & Hang: To make the snowflake last longer, lightly spray a thin coat of clear sealant (adult‑only). Then, thread a piece of string through a corner or attach a small clothespin for hanging.
These paper snowflakes look lovely when strung together in a window or draped across a bookshelf. You can even create a "snowflake chandelier" by attaching multiple pieces to a circular frame.
Cookie‑Cutter Clay Baubles – Soft, Edible‑Inspired Ornaments
For a tactile, sensory-rich experience, use air‑dry modeling clay that mimics the look of festive cookies. Kids can shape, paint, and personalize each bauble.
- Roll & Cut: Provide several colors of soft clay. Show kids how to roll the clay into a flat sheet about ¼‑inch thick. Use cookie cutters (stars, trees, gingerbread men) to cut out shapes.
- Make a Hole: Before the clay dries, use a thin straw or a toothpick to poke a small hole at the top for the hanger.
- Dry Time: Lay the shapes on a parchment sheet and let them air‑dry for 24‑48 hours, depending on thickness. You can speed up the process with a low‑heat oven (follow the clay’s instructions).
- Paint & Glitter: Once hardened, let kids paint their baubles with acrylic paints. Add a dusting of fine glitter for a frosted effect.
- String & Display: Thread a ribbon or thin wire through the pre‑made hole and tie a knot. Hang them on the tree or use them as gift toppers.
These clay ornaments are sturdy enough to become heirloom pieces that children can reuse year after year.
Handprint Reindeer – A Keepsake for Growing Kids
Capture your child's handprint in a festive reindeer design that you can frame or turn into a tree ornament.
- Prepare the Paint: Mix a small amount of washable paint with a drop of water to create a thin, spreadable consistency.
- Make the Handprint: Place a sheet of sturdy cardstock on a flat surface. Gently press your child's hand onto the paint, then onto the paper, creating a perfect handprint.
- Turn It Into a Reindeer: Using a fine‑tip marker, help your child draw antlers extending from the handprint's fingers, a cute nose (think red pom‑pom for Rudolph), and a smiling face.
- Add Details: Encourage them to add a tiny scarf made from a scrap of fabric or a ribbon. You can also glue tiny beads for eyes.
- Seal & Hang: Once the paint is dry, apply a thin layer of clear sealant (adult‑only) to protect the artwork. Punch a small hole at the top and thread a ribbon for hanging.
This personalized ornament becomes a treasured memory, especially when you compare handprints year after year.
Festive Felt Snowmen – No Glue, No Mess
Felt is forgiving, soft, and perfect for younger children who love to stitch or simply press shapes together.
- Cut Out Snowman Pieces: Using a simple template (circle for body, smaller circles for head, and a rectangle for the scarf), let kids cut felt with safety scissors.
- Layer & Pin: Stack the felt pieces and use child‑safe fabric glue dots or a few stitching stitches to hold them together. The glue dots are especially good for little hands because they don’t dry out.
- Decorate: Provide buttons, tiny pom‑poms, and fabric paint for faces, scarves, and hats. Kids can also use a needle and thread (adult‑assisted) to sew on tiny details.
- Make Them Hangable: Attach a small loop of ribbon to the back of each snowman. They can be clipped to a Christmas tree, a wreath, or a garland.
The best part? Felt snowmen are reusable; they can be taken out each holiday season for a quick, instant decor boost.
Wrapping Paper Gift Tags – Personalize Every Present
While not a tree ornament, personalized gift tags add a polished finishing touch to any present and keep kids involved in the gifting process.
- Cut Shapes: Provide pre‑cut rectangles or fun shapes like stars and bells.
- Write & Decorate: Let kids write the recipient’s name with markers, add stickers, or doodle tiny holiday scenes.
- Attach: Punch a small hole at the top and thread a piece of twine or ribbon.
When each child sees their own tag on a gift, they feel proud and excited to hand it over to Santa’s little helpers.
Quick Clean‑Up Tips for a Smooth Craft Session
Even the best‑planned crafting afternoon can get a little messy. Keep the peace with these simple strategies:
- Set a Timer: Give kids a 15‑minute window to finish each step. When the timer goes off, it signals a natural pause for clean‑up.
- Use a “Clean‑Up Song”: Sing a short, upbeat tune while everyone puts tools back. The rhythm makes tidying feel like part of the fun.
- Designate a “Lost‑And‑Found” Bin: Small beads, sequins, and glitter can hide under furniture. A clear plastic container labeled “Found Items” helps retrieve them quickly.
- Wash Hands First: Keep a bowl of warm, soapy water nearby so kids can rinse sticky fingers before moving to the next activity.
With these habits in place, the focus stays on the joy of creating, not the cleanup afterward.
Make It a Tradition – The Annual Ornament‑Making Night
Turn your DIY session into a recurring family tradition. Pick a night—perhaps the Saturday before December 24th—when the whole household gathers around a cozy lamp, hot cocoa, and a playlist of favorite holiday songs. Each year, you can add a new ornament to the collection, creating a timeline of memories that grows with your children. When the tree is finally lit, take a moment to point out each handmade piece and share the story behind it. It’s a heartfelt reminder that the best gifts are often the ones made with love.
Tags:
#DIY#Christmas Crafts#Family Activities#Kids#Holiday DecoratingIf you liked this, you might also like
Personalized Christmas Gift Ideas
Thoughtful, unique, and heartfelt personalized Christmas gift ideas perfect for family, kids, and fr...
How to Decorate Your Home in a Latin-Style Christmas
Bright colors, warm traditions, and festive energy: discover how to bring a vibrant Latin-style Chri...
Christmas Traditions Around the World
Explore unique Christmas traditions from different countries and discover how families celebrate the...

How to Decorate Your Home in a Northern Winter Christmas Style
Create a cozy, snowy, northern winter Christmas atmosphere with simple decoration ideas inspired by ...

Ready to write your letter to Santa?
Create a magical, personalized letter in minutes. It's free!