Sparkle & Joy: DIY Christmas Ornaments & Crafts to Make with Kids
Turn holiday prep into a magical family workshop with simple, fun ornament projects that kids will love creating. From pinecone glitter to recycled paper snowflakes, discover step‑by‑step ideas that fill your tree and hearts with cheer.
Gather Your Holiday Craft Kit – What You’ll Need
Before the glitter flies, set up a craft station that’s safe, organized, and kid‑friendly. Pull out a large table or kitchen island and lay down a disposable tablecloth or old newspaper to catch any sparkle. Here’s a quick checklist:
- Basic supplies: Scissors (child‑safe), glue sticks or white school glue, tape, and a hot glue gun (only for adult use).
- Decoration staples: Popsicle sticks, wooden beads, pom‑poms, pipe cleaners, and craft foam sheets.
- Seasonal goodies: Red, green, gold, and white glitter; metallic paint; ribbon, twine, and burlap; faux snow or cotton batting.
- Nature finds: Pine cones, acorns, small twigs, dried orange slices, and fresh evergreen sprigs.
- Recyclables: Cardstock, old greeting cards, toilet paper rolls, and bottle caps.
Having everything at arm’s reach keeps the momentum going and reduces the urge to rush to the kitchen for a snack (though a holiday treat is always a good idea!).
Pinecone “Snowy” Ornaments – Nature’s Little Gems
Pinecones are the perfect blank canvas for a winter‑wonderland vibe. Follow these simple steps:
- Collect small to medium pinecones. If you’re in a city, ask a neighbor for a few or buy a bulk bag from a craft store.
- Gently brush off any loose needles with a soft brush.
- Spray the pinecone lightly with water, then dust it with white glitter or shake it in a bag of fake snow. Let it dry.
- Attach a loop of ribbon or twine with a hot glue gun (adults only) or a sturdy piece of string.
- Optional: Add a tiny red bead or a miniature candy cane for a pop of color.
Kids love the tactile experience of shaking glitter onto the pinecone, and the result is a rustic ornament that looks as if it fell straight from Santa’s own forest.
Salt‑Dough Snowflakes – Edible Art for the Tree
Salt dough is inexpensive, easy to make, and can be painted after it hardens. It’s also safe for little hands who might be tempted to taste their creations (just remind them it’s for decorating, not munching!).
Recipe: Mix 2 cups of all‑purpose flour, 1 cup of salt, and 1 cup of warm water until you have a smooth, non‑sticky dough. Divide into small portions and let each child roll out a piece on a parchment‑lined tray.
Using cookie cutters (snowflake shapes work beautifully) or a simple knife, cut out shapes. Make a small hole at the top of each piece for hanging. Bake at 250°F (120°C) for 1‑2 hours until hard. Once cooled, let the kids paint with acrylics or watercolors, then seal with a dab of clear gloss for shine.
These ornaments are lightweight, perfect for hanging on delicate branches, and can become treasured keepsakes for years to come.
Recycled Cardboard Starbursts – Eco‑Friendly Sparkle
Turn old greeting cards or cardboard boxes into dazzling star ornaments. This project teaches kids about reusing materials while creating a glittering effect.
- Cut out a large circle (about 6‑8 inches) from the cardboard.
- Draw a star in the center and cut it out, leaving a ring of cardboard around it.
- Fold the ring into a cone shape, securing the edges with tape.
- Paint the cone with metallic spray paint or acrylics. While the paint is still wet, sprinkle glitter over the surface and shake off the excess.
- Attach a loop of ribbon at the top of the cone.
The result is a shimmering starburst that catches light beautifully. Plus, the whole family can participate—from cutting to painting—making it a perfect collaborative activity.
Pom‑Pom Snowmen – Soft and Huggable Decorations
Pom‑pom snowmen are adorable, fluffy, and incredibly easy to assemble. Here’s how to make a set of three that will sit on a mantel, a windowsill, or dangle from the tree.
- Gather three white pom‑poms in varying sizes (large, medium, small).
- Use a hot glue gun (or strong craft glue for kids) to attach the medium pom‑pom to the bottom of the large one, and the small pom‑pom to the bottom of the medium.
- Cut tiny felt shapes for eyes, a carrot‑shaped nose (orange felt), and a smile. Glue these onto the top pom‑pom.
- Attach a small piece of black felt or a tiny button for the hat, and a thin strip of ribbon for a scarf.
- Finish by gluing a loop of twine at the top for hanging.
The soft texture makes these ornaments safe for younger kids, and the bright colors add a playful touch to any holiday décor.
Handprint Reindeer – A Keepsake for Every Family
Capture the magic of the season with a handprint art project that doubles as a tree ornament. This activity works best with kids aged 3‑6.
Materials: Red and brown non‑toxic paint, a small canvas or sturdy cardstock, googly eyes, a black marker, and a ribbon.
- Paint your child’s hand brown and press it firmly onto the canvas to create the reindeer's body. Let it dry.
- Paint the fingertips with red paint and press them onto the canvas above the handprint to form antlers.
- Once dry, glue on googly eyes and use the black marker to draw a smiling nose.
- Attach a ribbon loop at the top so the masterpiece can hang on the tree.
Every year you’ll have a new handprint reindeer to add to the collection—a beautiful tradition that grows with your family.
Sticker‑Mosaic Baubles – Quick, Colorful, and Mess‑Free
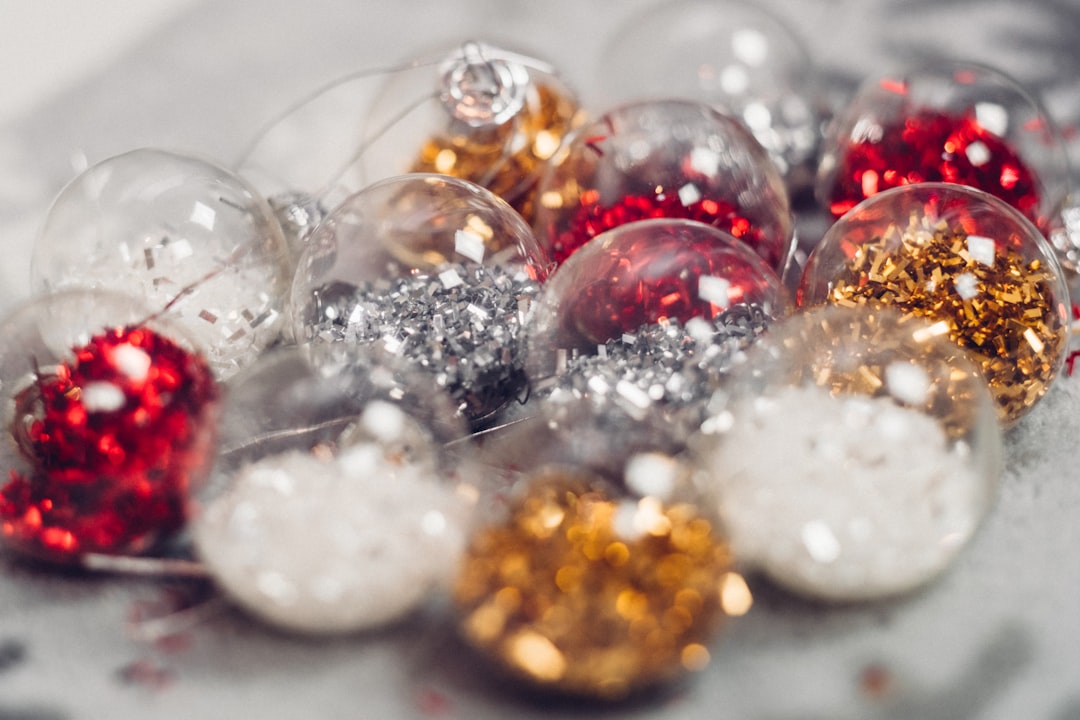
If you’re short on time or want a low‑mess option, stickers are a lifesaver. Use round, clear bauble shells (available at most craft stores) and let kids fill them with stickers of their choice.
Here’s the quick process:
- Open a clear plastic ornament and set it on a piece of wax paper.
- Let each child place stickers inside, covering the entire interior surface. Encourage them to create patterns—chevron, polka‑dot, or a festive scene.
- Close the ornament, shake gently to smooth out any air bubbles, and add a ribbon loop.
The result is a vibrant, glossy bauble that reflects light beautifully, and the activity is perfect for toddlers who aren’t ready for glue or glitter.
Tips for a Smooth Craft Session
- Set a time limit: Ten‑minute bursts keep younger children focused and prevent meltdowns.
- Dress for the job: Put on old shirts or aprons—crafts can be messy, and it’s easier to clean up later.
- Safety first: Keep scissors, hot glue guns, and small beads out of reach of children under three.
- Display proudly: Designate a “Ornament Shelf” where every creation gets a spot. Kids love seeing their work on display.
- Involve the whole family: Assign roles—one person cuts, another glues, a third paints. Collaboration makes the experience richer.
Turning Craft Time into Holiday Traditions
When you repeat these projects year after year, they become more than just decorations; they’re memory‑makers. Consider creating a “Craft Calendar” where each Sunday leading up to Christmas features a new ornament idea. Capture photos of each finished piece and compile them into a digital album or a printed scrapbook. By the time the next holiday season rolls around, you’ll have a beautiful timeline of family creativity.
Remember, the goal isn’t perfection—it’s the joy of making, the sparkle in a child’s eyes, and the warmth of family togetherness. So grab those glitter sticks, roll up your sleeves, and let the holiday magic begin!
Tags:
#DIY#Christmas#Kids Crafts#Family FunIf you liked this, you might also like

Unwrapping the Magic of Santa: A Fun History for Kids
Discover the fascinating story of Santa Claus, from his origins to his modern-day legend, and get re...
Turning Holiday Wishes into Joyful Memories: A Parent’s Guide to Kids’ Christmas Wish Lists
Discover smart, stress‑free ways to guide your children through creating Christmas wish lists that s...
Eco‑Friendly Christmas Crafts: Fun Projects with Recycled Materials for the Whole Family
Turn everyday leftovers into dazzling holiday decorations! Discover step‑by‑step recycled crafts tha...
The Magic of Reindeer: Fun Facts and Festive Stories for Kids
Discover the wondrous world of reindeer with kid‑friendly facts, enchanting tales, and hands‑on acti...

Ready to write your letter to Santa?
Create a magical, personalized letter in minutes. It's free!